Console Terminal
The StreamIOToConsoleTerminal allows any Virtuoso data stream to be easily visualized in a console terminal.
Description
The Console Terminal control displays any streaming data, such as serial port data.
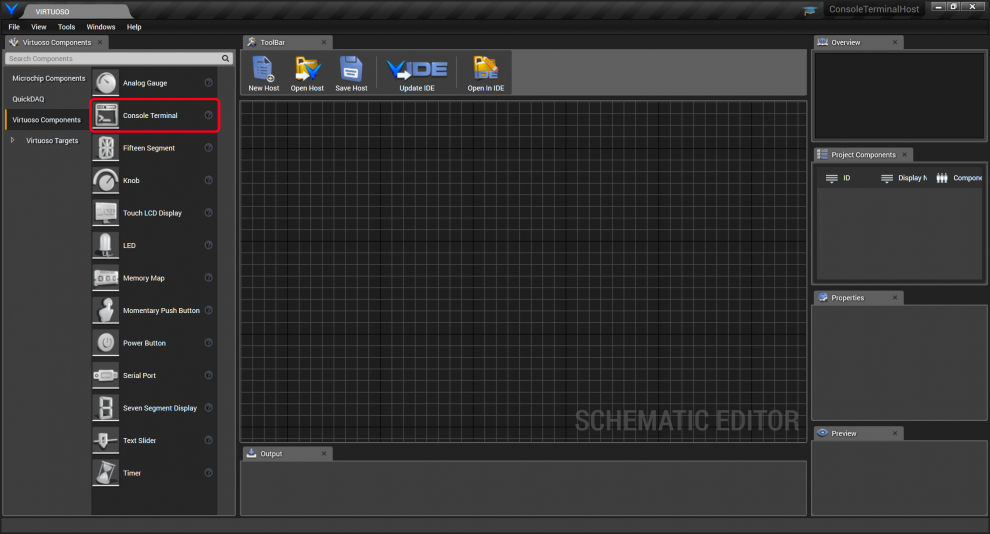
To use a Console Terminal, drag and drop it from the Virtuoso Components control group onto the schematic, or right-click the schematic area and type “Console” and select the Console Terminal from the drop-down.
The Console Terminal has two input stream ports and two stream output ports, as shown below.
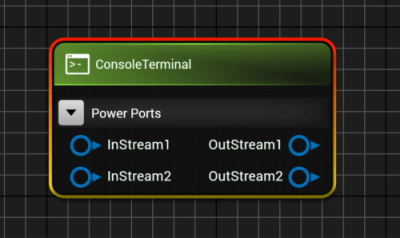
Stream data on each of the input ports can optionally be configured to be forwarded to output streams. Thus, the Console Terminal can function to join streams. In addition to input stream data being forwarded to output streams, the data is displayed in the console view, and data typed into the Console Terminal can optionally be routed to the output streams.
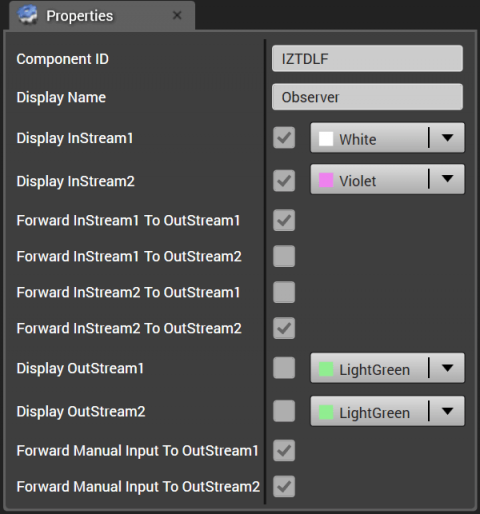
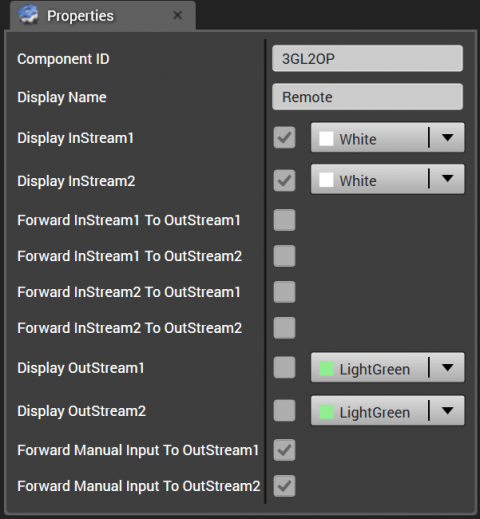
The Console Terminal’s properties are shown below.

The Component ID is generated randomly when the Console Terminal instance is created.
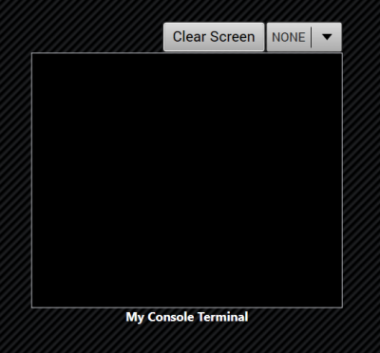
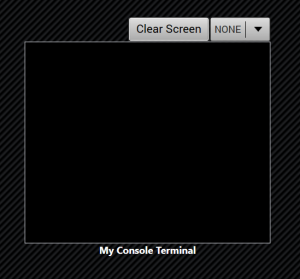
The Display Name is shown beneath the Console Terminal at runtime as shown below. The Console Terminal control can be resized as needed.
Each of the display InStreams and OutStreams can optionally be displayed in the console terminal when data comes in or goes out. If the checkbox is checked, the data will be displayed in the terminal with text of the specified color; if the checkbox is unchecked, the data won’t be displayed in the terminal.

The “Forward InStream[x] To OutStream[y]” checkboxes specify whether data received on a particular input port is forwarded to an output port. If the console is used to display full duplex stream data, typically the InStream1 will just forward to OutStream1, and InStream2 will just forward to OutStream2. Then traffic in both directions can be displayed in the console.
The “Forward Manual Input To OutStream[x]” checkboxes specify which output ports, if any, should transmit data that is typed into the Console Terminal.
To easily see how the Console Terminal works, drag and drop three Console Terminals onto the schematic and connect them as shown below.
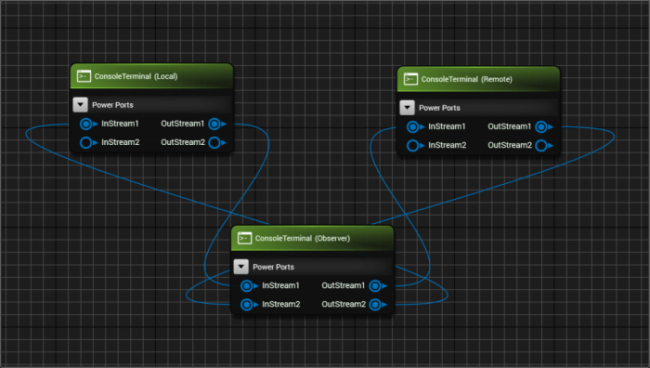
For these connections, the “Local” terminal on the left transmits to the “Remote” terminal on the right through the “Observer” terminal in the center, as shown.
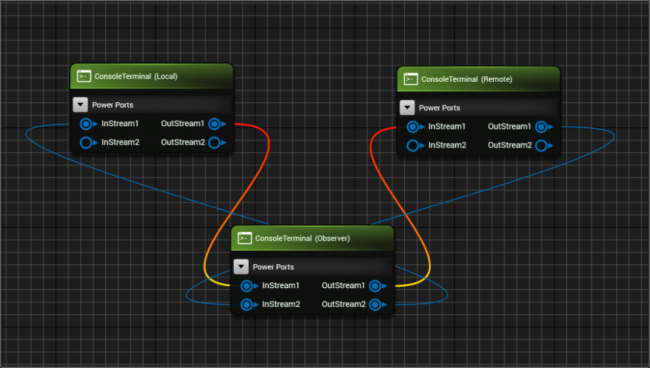
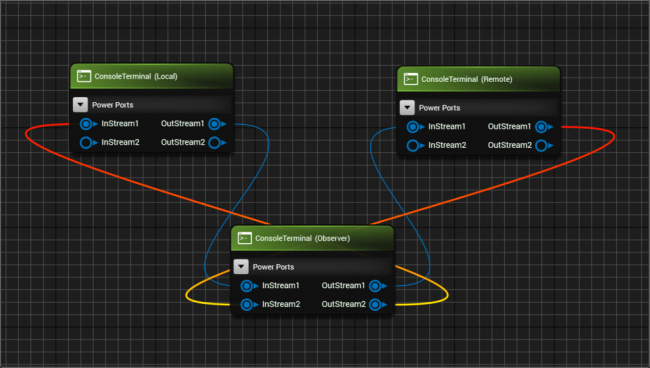
The “Remote” terminal is then wired to transmit to the “Local” terminal through the “Observer” terminal in the center, as shown.
The Local terminal is configured to display data from the Remote terminal on InStream1 as Violet data, and text typed into the terminal is forwarded to OutStream1.

The Observer terminal is configured to display the data transmitted from the Local terminal as white text and data from the Remote terminal as Violet text. Data from InStream1 is forwarded to OutStream1, and data from Instream2 is forwarded to OuStream2. Thus, the Observer terminal is configured to just transparently observe the data flowing in either direction and display them with different colors.
The Remote terminal is configured to display the data that it transmits as Violet, and to display the data received from the Local terminal as white text.
The XAML code emitted for the three console terminals for a C# WPF host are as shown below, with the data context for each binding to their respective view models.

The emitted base view model code regions are shown below. The console terminal view model properties are declared:
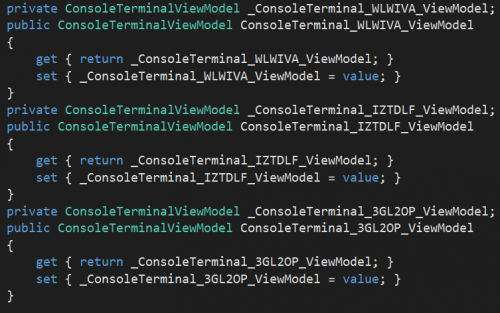
They are then initialized in the initialization section based on their configurations:

The port connections result in stream data forwarding snippets, forwarding the data from one port to the other, as shown.

The terminal can be resized as needed. The terminal has a Clear Screen button, and a data format combo box. You can specify the data format as NONE (string), HEX, ASCII, or OCTAL.
The video below shows the setup, configuration, and use of the console terminals with manually typed data. The terminals can be connected with any Virtuoso Stream.